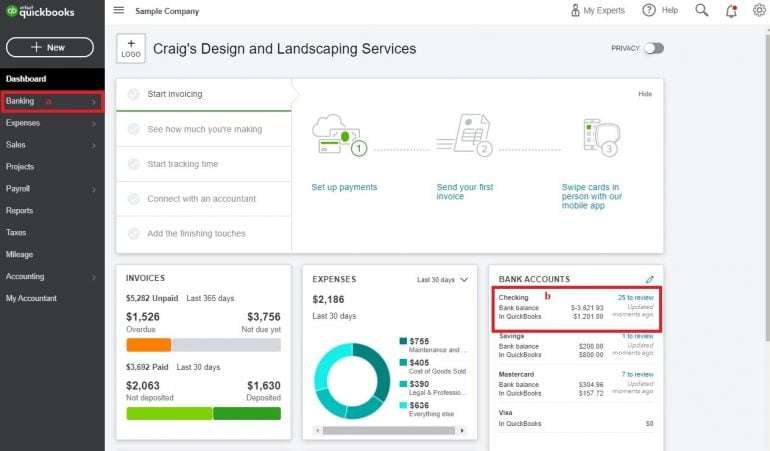
Navigating the intricacies of financial management often involves correcting errors, and understanding how to void a check is a crucial skill for anyone using QuickBooks Online. The ability to efficiently and accurately void a check ensures that your financial records remain pristine and reflect the true state of your business’s finances. This process, when done correctly, prevents discrepancies and helps maintain the integrity of your accounting data. Learning how to void a check in QuickBooks Online is a straightforward process that can save you time and prevent headaches down the line.
Before diving into the “how-to,” it’s important to understand why voiding a check is preferable to deleting it. Deleting a check removes it entirely from your records, which can create gaps in your check sequence and potentially lead to audit issues. Voiding, on the other hand, keeps a record of the check but marks it as invalid, maintaining the integrity of your audit trail.
Voiding a check is appropriate when:
- The check was created in error.
- The check was never issued.
- The check needs to be replaced with a new one.
Here’s a detailed guide on how to void a check within the QuickBooks Online platform:
- Access the Check: Navigate to the “Expenses” tab and then select “Checks.” Locate the check you wish to void. You can use the search bar to find it quickly.
- Open the Check Details: Click on the check to open the detailed view.
- Select “More” and then “Void”: In the check details window, you’ll find a “More” button (usually located at the bottom of the screen). Click on it, and a dropdown menu will appear. Choose the “Void” option.
- Confirm the Void: A confirmation window will pop up asking if you’re sure you want to void the check. Click “Yes” to confirm.
- Verify the Void: The check will now be marked as “Void” in your records. The original check number will remain, but the amount will be zero.
Add a Memo: When voiding a check, consider adding a memo explaining why it was voided. This will provide valuable context for future reference.
Consult with an Accountant: If you’re unsure about whether to void or delete a check, or if you’re dealing with a complex situation, consult with a qualified accountant.
Regularly Review Your Records: Regularly reviewing your financial records will help you identify and correct errors promptly.
| Feature | Void | Delete |
|---|---|---|
| Removes the transaction completely | No | Yes |
| Maintains audit trail | Yes | No |
| Leaves a record of the check number | Yes | No |
| Recommended for correcting errors | Yes | Generally not recommended |
Understanding the proper procedure for voiding checks helps ensure accurate financial reporting and maintain the integrity of your accounting records. Remember, following these simple steps will allow you to easily void a check within QuickBooks Online, saving you time and potentially preventing future accounting issues.
Navigating the intricacies of financial management often involves correcting errors, and understanding how to void a check is a crucial skill for anyone using QuickBooks Online. The ability to efficiently and accurately void a check ensures that your financial records remain pristine and reflect the true state of your business’s finances. This process, when done correctly, prevents discrepancies and helps maintain the integrity of your accounting data. Learning how to void a check in QuickBooks Online is a straightforward process that can save you time and prevent headaches down the line.
Understanding the Importance of Voiding Checks
Before diving into the “how-to,” it’s important to understand why voiding a check is preferable to deleting it. Deleting a check removes it entirely from your records, which can create gaps in your check sequence and potentially lead to audit issues. Voiding, on the other hand, keeps a record of the check but marks it as invalid, maintaining the integrity of your audit trail.
When to Void a Check
Voiding a check is appropriate when:
- The check was created in error.
- The check was never issued.
- The check needs to be replaced with a new one.
Step-by-Step Guide: Voiding a Check in QuickBooks Online
Here’s a detailed guide on how to void a check within the QuickBooks Online platform:
- Access the Check: Navigate to the “Expenses” tab and then select “Checks.” Locate the check you wish to void. You can use the search bar to find it quickly.
- Open the Check Details: Click on the check to open the detailed view.
- Select “More” and then “Void”: In the check details window, you’ll find a “More” button (usually located at the bottom of the screen). Click on it, and a dropdown menu will appear. Choose the “Void” option.
- Confirm the Void: A confirmation window will pop up asking if you’re sure you want to void the check. Click “Yes” to confirm.
- Verify the Void: The check will now be marked as “Void” in your records. The original check number will remain, but the amount will be zero.
Best Practices and Considerations
Add a Memo: When voiding a check, consider adding a memo explaining why it was voided. This will provide valuable context for future reference.
Consult with an Accountant: If you’re unsure about whether to void or delete a check, or if you’re dealing with a complex situation, consult with a qualified accountant.
Regularly Review Your Records: Regularly reviewing your financial records will help you identify and correct errors promptly.
Void vs. Delete: A Comparison
| Feature | Void | Delete |
|---|---|---|
| Removes the transaction completely | No | Yes |
| Maintains audit trail | Yes | No |
| Leaves a record of the check number | Yes | No |
| Recommended for correcting errors | Yes | Generally not recommended |
Understanding the proper procedure for voiding checks helps ensure accurate financial reporting and maintain the integrity of your accounting records. Remember, following these simple steps will allow you to easily void a check within QuickBooks Online, saving you time and potentially preventing future accounting issues.
Troubleshooting Common Issues
While the process of voiding a check in QuickBooks Online is typically straightforward, users may occasionally encounter issues. Understanding how to troubleshoot these common problems can save time and frustration. For instance, a user might find the “Void” option is greyed out or unavailable. This often happens if the check is reconciled. If the check is reconciled, it must first be unreconciled before it can be voided. This ensures that changes made in QuickBooks Online are accurately reflected in your bank statements.
Reconciling a Voided Check
After voiding a check, it’s crucial to reconcile your accounts. The voided check will appear on your bank reconciliation screen with a zero amount. This allows you to match it against your bank statement and ensure your records are in balance. Ignoring voided checks during reconciliation can lead to discrepancies and inaccurate financial reports.
Impact on Reports
Voiding a check impacts various reports within QuickBooks Online. These reports will reflect the zero-dollar value of the voided check, effectively removing its impact on your overall financial figures. It is important to review key reports, such as profit and loss statements and balance sheets, after voiding a check to ensure the changes are accurately reflected and that no unintended consequences have occurred. Furthermore, always remember the proper steps on how to void a check, and your accounting will be much easier.


